
Good Morning Class!
Before we get started, let's check to see if you have everything that you need. If your chair is about the size of mine, You will need about 7 yards of fabric. Do you have your cording (if you plan to use cording on your project)? I'll share a little secret with you here... I don't buy my cording at the fabric store, where you have to purchase by the yard. If you will go to your local dollar store, you can find either cotton or poly "clothes-line" cording. It's the same thing, only way cheaper. About $2 for 100 feet.

You will also need curved upholstery needles. You will have to do some hand sewing. No way around it. You can find these at most fabric stores. I ordered mine from http://www.beaconfabric.com/. They will send you a free catalogue, and they have absolutely everything you need for upholstery.http://www.beaconfabric.com/vindex.html

I will be using self covered buttons for the back cushion. I also order my upholstery button shells from Beacon. You want to make sure that you use good upholstery button shells that have teeth.
Please do not use button kits without the teeth around the rim. Trust me on this.
The next item that I use is tacking strip. This is not absolutely necessary, but it really does give your chair a professional finish. I highly recommend it. Also from Beacon. You can purchase this for about 35 cents per yard. 10 yards is more than enough.

You will also need upholstery tacks. You can go to your local hardware store and purchase these in small packages for $1 - $2 each. Also referred to as carpet tacks, or cut tacks.
And of course your staple gun with 1/4 to 3/8 inch staples.
Now we can get started.
If your seat and back cushions are in good shape, and therefore don't need to be replaced, that's great. Mine, however, were not. So the first thing I will do is make a pattern to use when I cut out my new foam.
(My foam supplier is Foam for You ) ~ But most local fabric stores will have lots to choose from.
To make the pattern, I used 2 scrap pieces of fabric sewn together, just to get a piece that's large enough to cover the chair bottom. You can use anything to make a pattern, newspaper, tissue paper, wrapping paper, etc.

Next I trace around the seat and around the front of the armrest to mark my pattern.

Cut out your pattern. Here's another little tip.
Fold your pattern in half and check along the cutting line. Make sure that the left side and right side are the same. You want your pattern to be symetrical. Trim up any uneven edges.
I'm using 3" foam for the seat, so I lay out my pattern on the foam, and mark it with a sharpie.

The best way to cut foam is with an electric bread knife.
If you have a self healing mat, you will want to use it underneath.

Check for fit.

Perfect-O !!
Now, my chair's original seat cushion was not removable. I didn't like the way it looked...

There is no way that fabric which is gently curved around a cushion, is going to pull down over a wood corner, and look good. See what I mean? I decided to make the seat cushion removable. So I will put the seat cushion aside for now.

I added a layer of heavy duty fabric to the seat base, just for a little more stability. Then a layer of poly batting to the arms. Stapled under the armrest.

Now to measure for the arms. These are covered in 2 sections. The first will cover the front of the armrest, the inside of the arm and wrap over the armrest, stapled underneath. The second piece will cover the outside of the chair. To measure for the inside piece - start at the seat and measure up and over the armrest.
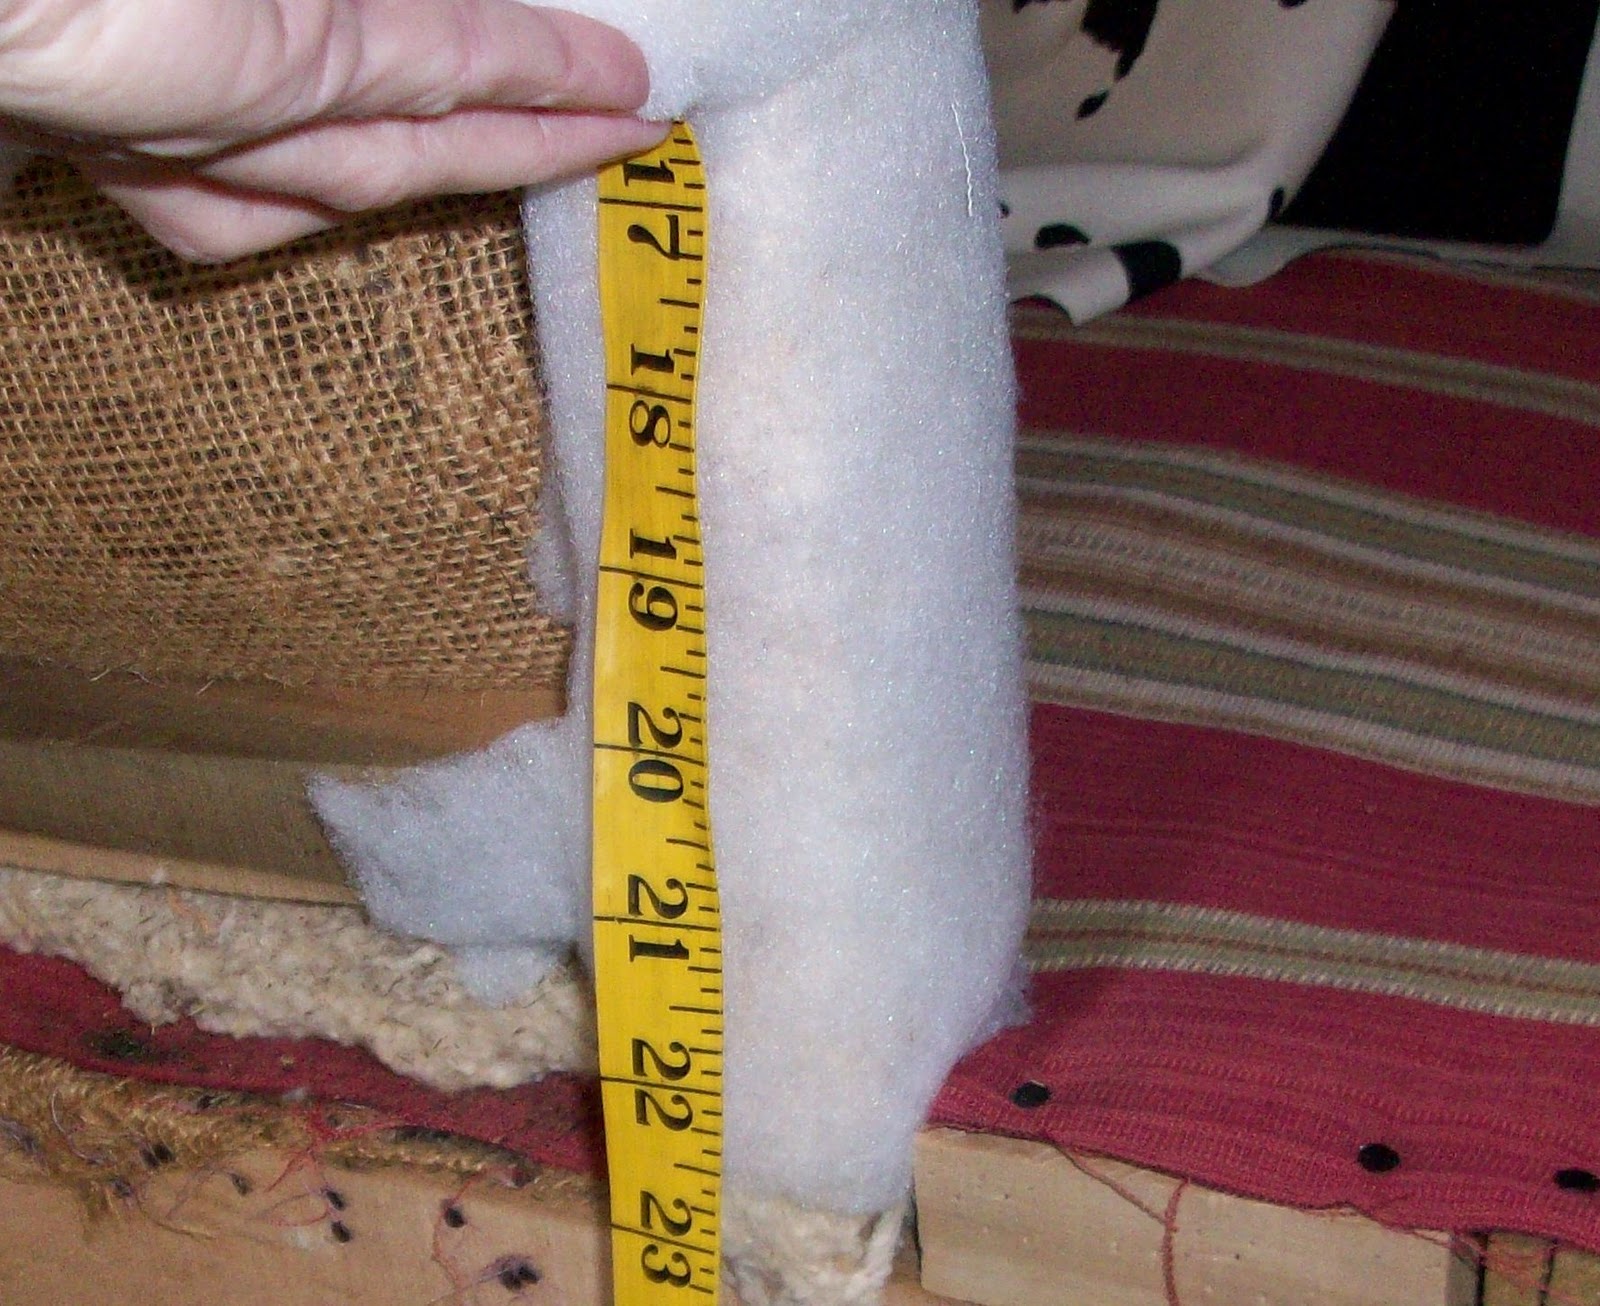
Add a few inches to tuck down and secure to the inside of the chair, and a few inches at the top to be sure you have enough to tuck under the armrest.
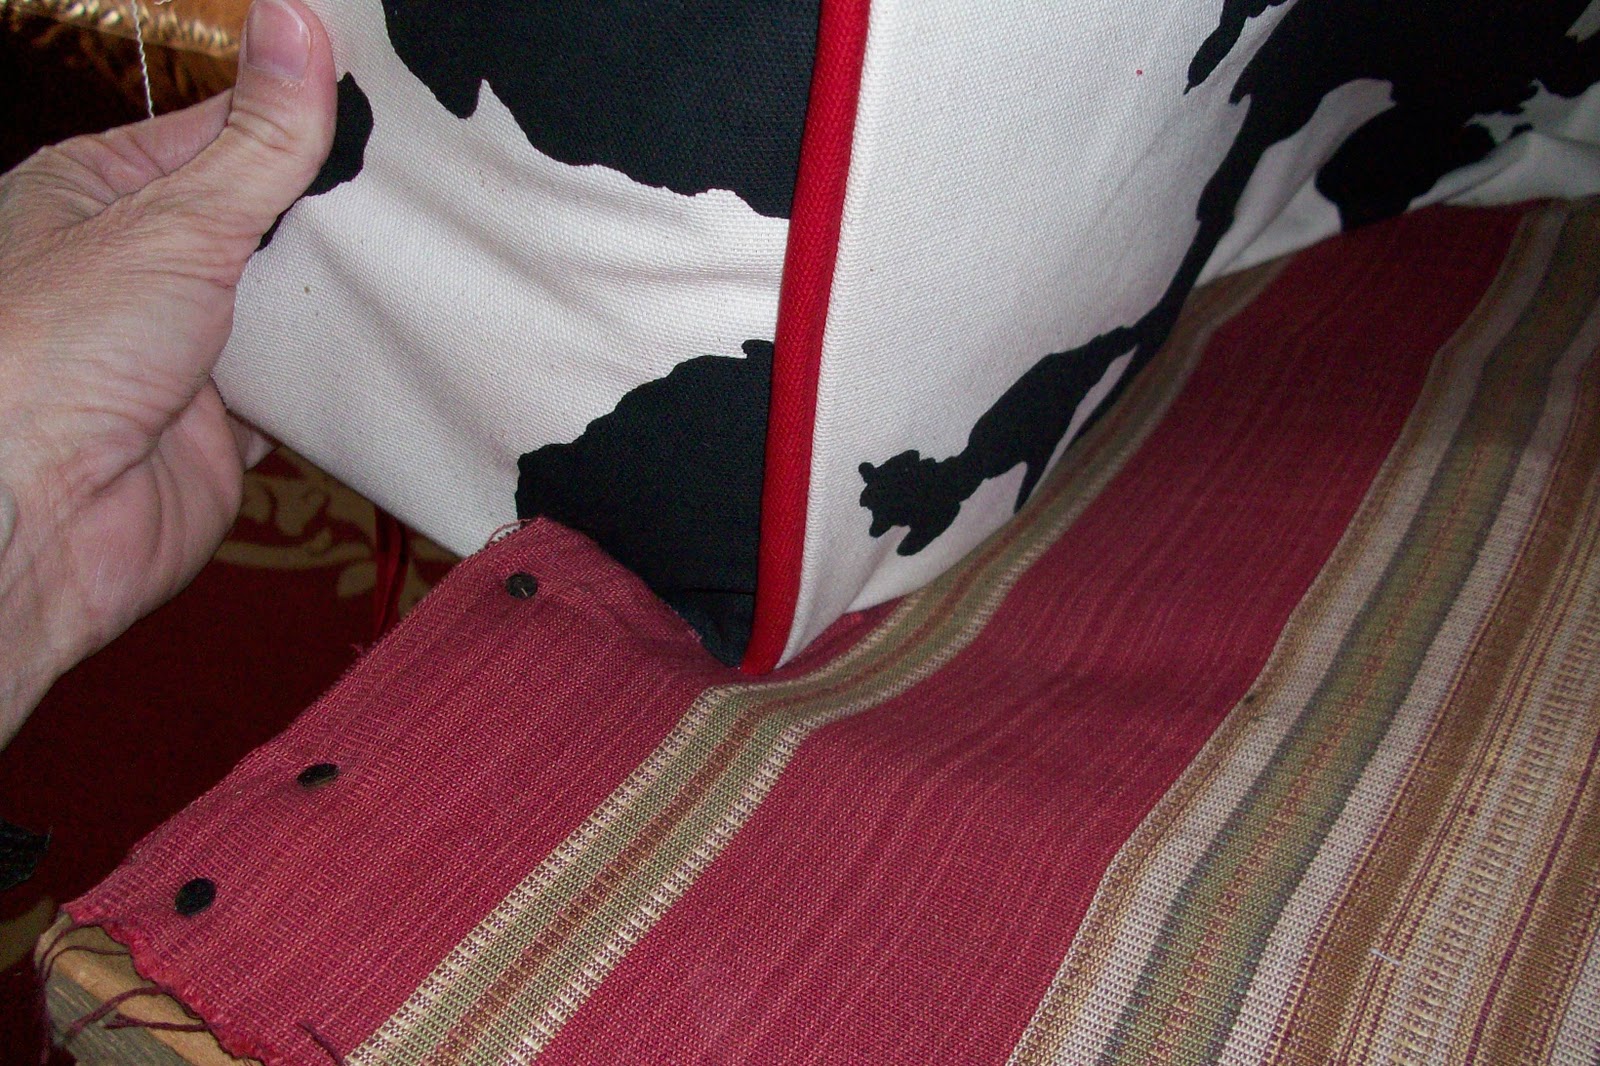
Now I measure the widest part of the front of the armrest. This one is rather narrow, only about 4 inches. I want a piece about 2 inches wider to cover this. I've added a strip of my red cording to one side of my arm piece, then sewn the piece for the front of the arm rest to that.
Like this ~
Please note that your cording will be much longer than your fabric pieces. The fabric will only cover the front and inside of your arm, but the cording should be long enough to go completely around the front of your armrest and to the bottom of the chair, with extra to tuck underneath.

Before I show you how to secure this to the inside lower edge of the arm, I want you to see what the end result should be...
You need to be sure that you have a few inches to tuck into here...

and secure with staples or tacks to the frame.
Like this...

So let's get to it...
(in this photo I have already trimmed away my excess fabric)
turn up your extra few inches of fabric and secure with a tack to the lower edge of the arm.

Now you can pull your fabric up and over the arm.
See that your cording is properly placed along the inside edge of the arm.
You'll have something like this.

Beginning at the lower edge of the outside of the arm, fold the front of the armrest fabric around to the ouside and staple on the outside edge of the frame. These staples will be covered up later on. Continue up the front of the armrest. You want the front of your armrest to be covered smoothly, don't pull too tight.

There will be excess fabric that you will need to trim away, like this ~

Now you can smooth the fabric over the armrest, to secure it underneath.

Staple or tack into place. Your cording should be long enough to go to the bottom of your chair and tuck underneath.

Go ahead and add your new seat fabric at this point. I added a few layers of batting to soften the hard edges around the front of my chair. You will have to cut notches in the fabric so it can slide smoothly through the openings at the back and sides of your chair. Staple it down.
Now you can secure the lower edge of your arm fabric.

You will have to clip the lower edge of your fabric where ever your fabric meets the wood frame, in order to pull your fabric through.

Same process for the back of the arm.

You can see where I have cut slits long enough for the fabric to be pulled smoothly through to the back. Now I can secure this to the back of the frame.

Next, smooth the fabric over the top of the armrest and staple underneath.

Trim away excess fabric.

You should have something like this.
Now getting the arms done is probably the most difficult part.
So it's all down hill from here!
For homework you should finish the other arm, and we will pick it up here tomorrow.
Teacher has to get to work now.
Any questions?


That chair is so cute, I can't stand it. I adore that red piping and that cow print. You are so good at this. I would probably be lost, Teresa, but these really are good directions and hints at what works. Thank you again for this tutorial. It's GREAT!
ReplyDeleteXO,
Sheila :-)
Curved needles? I have never heard of such, but I have now! Neat!
Thank you Shiela! Hope you're feeling better. If I ever get to come for another visit, I'll bring a machine and we can make (or remake) something special just for you!
ReplyDeletexoxo,
T