
Before we get started, let me just say this...
Don't be overwhelmed by the gazillion photos here. When I upholster a project, I take tons of photos. I will go over each step in great detail, to hopefully answer any questions you may have.
If I can do this ~ You can too.
Just take it one step at a time.
One more thing before we get started.
Yesterday, I did forget to mention one of the tools that I find most helpful.
A digital camera.

Now, in truth, this is NOT a necessary tool.
However, it is the MOST helpful, in my book.
Now, are you ready to get started?
Lets go.
I like to do this part outside, because it is the messy part.
You will probably want to do the same... trust me.
Remove any loose pillows or cushions.

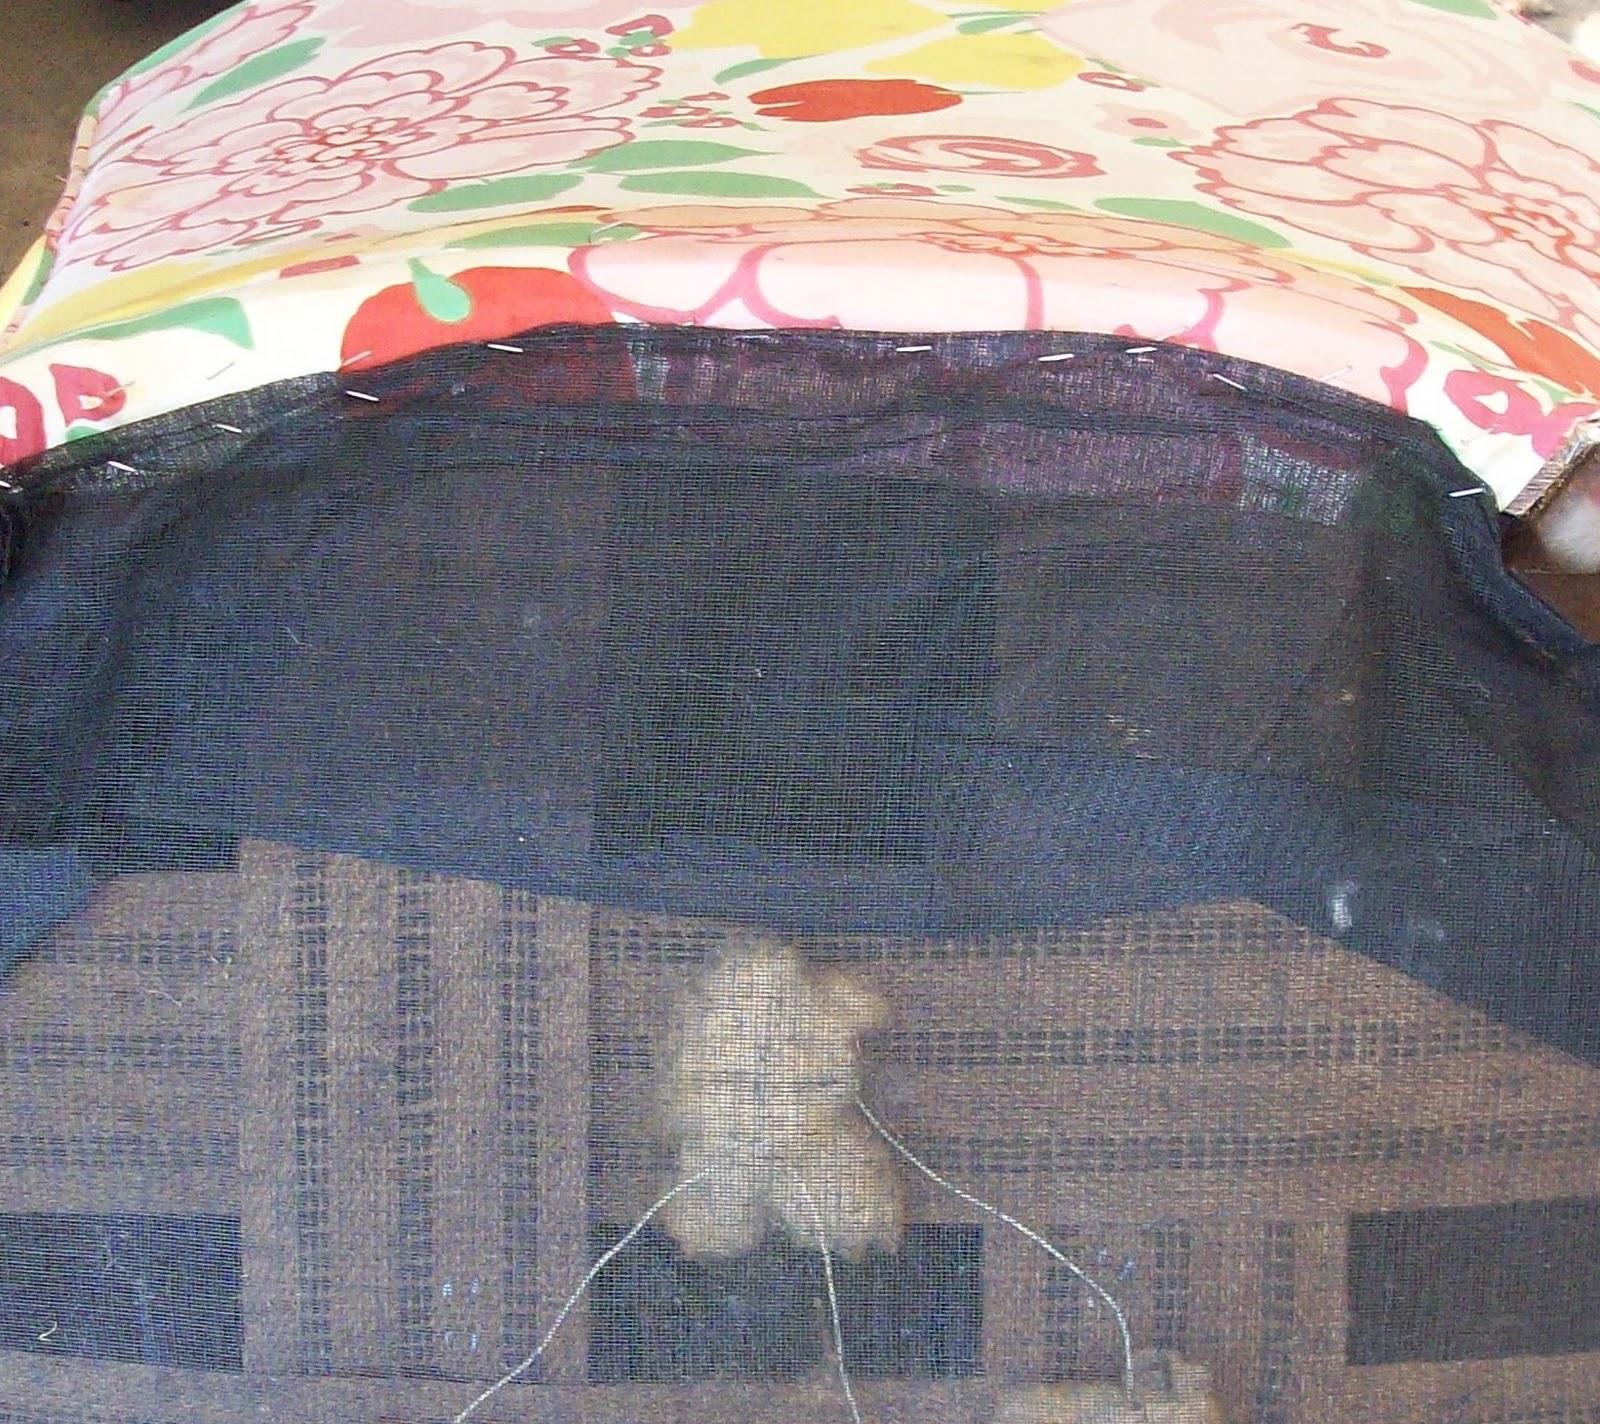
First, we remove the old cover, in the reverse order of how it was covered. In other words, the last piece of fabric to go on the chair, is the first piece to come off. In most cases, the last piece of fabric to go on, is either the back, or a piece of fabric covering the very bottom of your chair (closest to the floor).
With this chair, I removed the bottom (black fabric) covering first.
You should begin taking your photos now, and at each step along the way. This way, when you re-assemble your project, if you have any questions of what to do next, all you have to do, is go back to your photo journal, to remind yourself.
If you have a covering like this, once removed, just toss it in the garbage. Now, you will have to remove as many staples as possible.

Trust me on this... you REALLY want to remove as many staples as possible. I learned this the hard way. Don't try to cheat, and leave those staples in there... You may think that "No one will ever know, besides, they'll be covered up later on". Uh-uh. Later on, when you are affixing your new cover, and you try to staple it down... and all of those staples are in the way... You will understand.
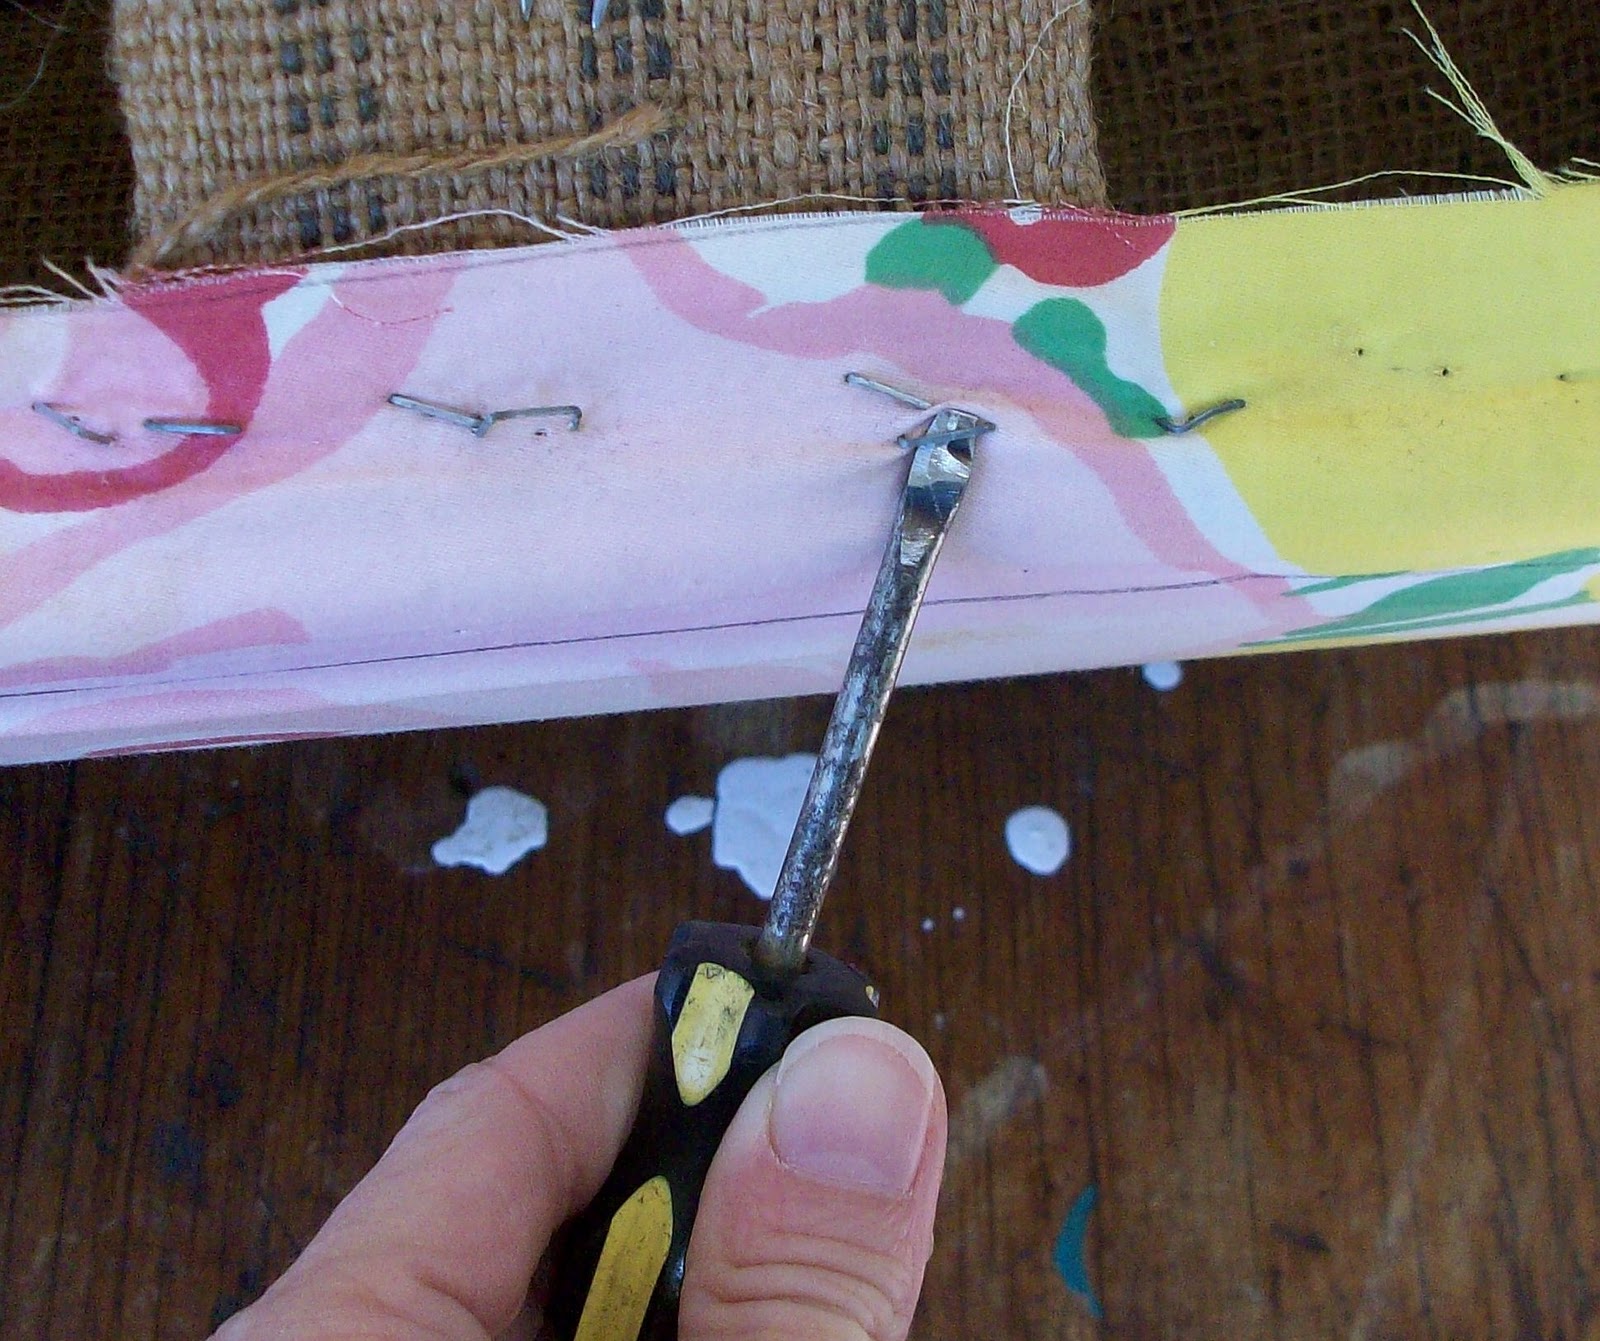
You can remove most of the staples with pliers. Some staples will be rather flush, and hard to get a grip on. For those staples that are difficult to remove, use your flat head screwdriver to wiggle it up a bit, then you can pull them out with pliers.

But DO NOT remove any of those large brass staples that may be holding webbing or strapping in place.
(Unless the straps are disintegrating, and you are willing to replace those as well). Straps like these are part of the basic structure of the chair, so you don't want to remove these.

You can easily see the difference in staples. The smaller aluminum staples are the ones that you should remove. NOT the large brass ones. But DO remove the aluminum colored (smaller) staples from the webbing.
So that only the large brass staples are left.
Like this.

Now, look for the next-last piece that was added to the chair.
In my case, it was the pleated skirt. You can see where the skirt began and ended.
See?

So that is where I begin removal of the skirt. Use your pliers.

If you want to keep the old skirt to use as a pattern for the new skirt, you can do that. I usually toss it.
Next ~
The backs of chairs like this are usually hand sewn down each side, then stapled underneath.
The hand stitching will look something like this...

Remove any staples from the underside of the chair, that are holding this piece of fabric in place.
Loosen the hand stitching.

Cut all of those threads.

Once both sides have been released, you will probably find that the top of the back piece is secured with more staples, and probably cardboard strips.
Like this.

Now you have to remove all of those staples, as well as the cardboard strips. Don't bother trying to save the cardboard strips. That is just NOT possible. Then you should be able to remove the back. If the upper edge is secured with hand stitching, just clip those.
You may want to save this back piece as a pattern for the replacement. I usually toss it. But you may want to keep it.

If you have cording around your back, like I did, remove it, toss it.
Now ... If your chair has button tufting, like mine did, You will see something like this, securing those buttons in place.
Go ahead and cut these ties, along with any wadding (like in the photo). Toss it.
While you're at it, if the seat has button tufting, like this...

Remove those as well. I will not be tufting the new seat. Personally, tufting on seats, to me, is just a place for crumbs to gather. Ewwww.
Next, remove all additional staples along the back of the chair.

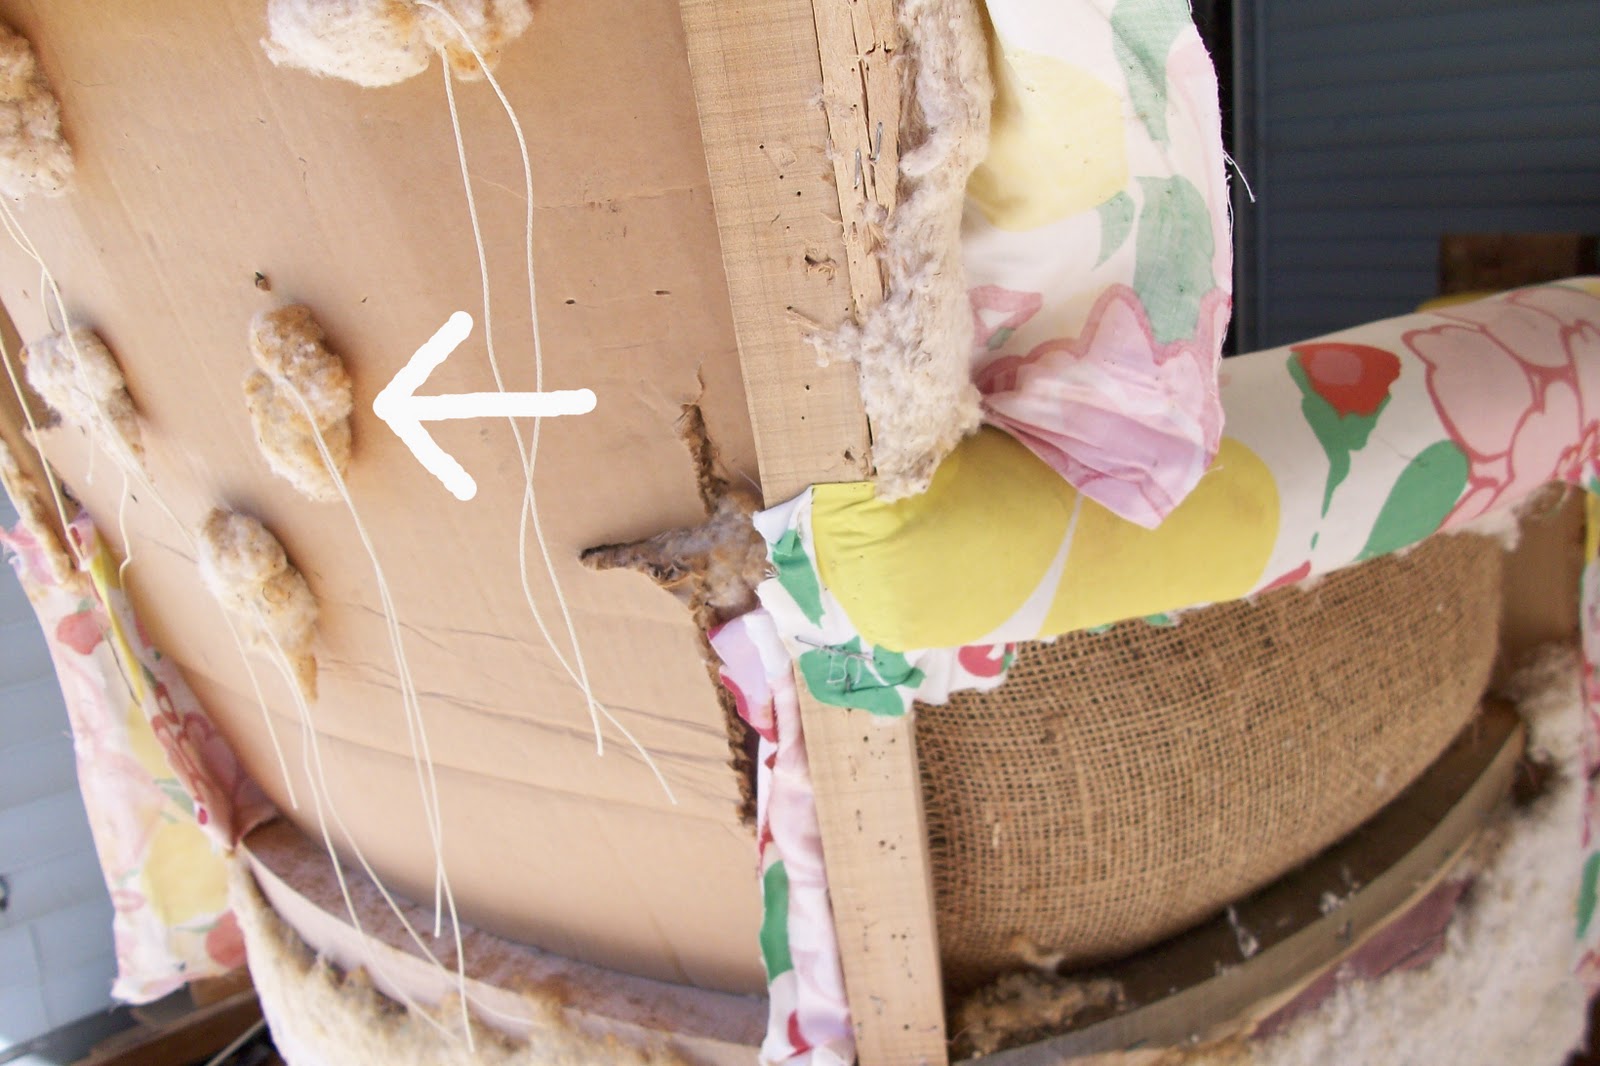
Now, I want you to notice something here ~

In the area that I have marked #1 ~
This is the back of the arm rest. You can see that the fabric that covers the arm rest was secured first. Then the fabric covering the side of the chair was next. Above that, the fabric for the front of the back cushion wraps around to the back of the chair.
I know that sounds very confusing. I just want you to pay close attention to your chair in this area. Take lots of photos here. This tends to be one of the more confusing areas when you are ready to recover.
In the area that I have marked #2 ~
I just want you to take a mental note. You see this is where the inside of the arm rest, and lower edge of the back cushion is tucked through, and secured to the back of the frame. Pay close attention to the way your chair is done in this area. Get lots of pics.
Now ~
Remove all of those staples that are securing the fabric from the back cushion and arm rest, (or side of the chair). Also, remove any staples securing the outside (or chair side) fabric to the underneath of the chair.
Next ~ the outer side of my chair was secured with more hand stitching near the front of the arm rest. Clip all hand stitching.

You will want to pay close attention in areas like this. Notice that you have the front of the armrest, the outside of the armrest, the seat cushion fabric, the cording for the lower edge of the chair, all coming together in this area. Lots of pics.
The outside of your chair, or armrest will look something like this.
Then I fold this piece of fabric over the armrest to expose the cardboard strips and staples that is securing this piece of fabric to the underside of the armrest.

Like so ~

Take note (and lots of photos) of the way that this piece is secured to the underside of the armrest and back of your chair.

You see how the cardboard strip is stapled under the armrest, and then wraps around the back? When I recover the chair, I will do exactly the same thing.
Now, remove the staples, cardboard strips and any hand sewing. You can keep this piece to make your pattern, if you like. I toss it.
Next ~

More cardboard strips and staples to remove.

Still more pesky staples...

and more.
Take note (and photos) of the way that the front of your armrest is covered.


Because you will recover it in the same way.
Now, the inside of the armrest will be tucked in, most likely between 2 pieces of wood on the lower side of the chair, and stapled. Remove those staples and your fabric should be free. Once again, keep it for a pattern if you like, I toss it.

Next, I removed all of the old cotton that was covering the lower outer edges of the chair frame.
The original seat cushion was stapled to the frame, I removed all of those staples and the seat cushion was free.

Free at Last!!

I left the original cotton on the arms and upper edge of the back, because it was still in good shape, and I like the shape that it has.
WHEW!!
Now you should take a broom and vigorously give her a once over. (Think 40 years worth of dirt).
I think that's enough for today. We will get started on the new look tomorrow.
Any questions, class?


Honestly, Teresa, that is one of the best, most well thought out tutorials I have ever seen. If I had a chair here to upholster, I would try to do this. Thanks for sharing your knowledge and skill with us. I have ALWAYS wanted to upholster something, and you have helped give me the confidence to try. THANK YOU!
ReplyDeleteXO,
Sheila :-)